Back in the day we did a lot of road trips across this beautiful, big continent. Australia is a large place and our Corolla has seen a lot of it. When the babies arrived, we started flying for most of our trips and experienced all the ups and downs associated with that! This past Christmas we agreed that the kids, aged 3 and 5, were the right age to undertake their first big car trip from Sydney to Adelaide and return. That’s approximately 3,000 kms there and back or 28 hours driving in total. We spent some time planning the trip, took our time and had a really enjoyable experience. Road trips are not for everyone, but if you’re considering a big journey with little kids I would love to offer these 10 tips:
1) Pack plenty of snacks
 My children seem to be perpetually grazing. Pack a variety of healthy (and some not so healthy) snacks in advance. Have the esky accessible and distribute these as the need arises. With a little planning there’s no need to rely on petrol stations and roadhouses for your food fix.
2) Prepare meals in advance
 On the road we usually have lunch at a cafe and prepare the evening meals in advance. Pre-cook your meals at home, freeze them and then let them slowly defrost in the car esky on the way to your destination. This way I know that we’ll have at least one decent healthy meal a day and it also helps to maintain your regular night-time routine. Good meals to freeze are those that are sauce based eg bolognaise, curry etc. You can take the dry rice or pasta with you to cook fresh on the stove top, but most of the grunt work has already been done.
3) Stay in Caravan Parks
 For the same price as a motel, you can stay in a fully self-contained two bedroom cabin…usually with a playground and swimming pool at your doorstep. Unlike a motel room, you can put the children to bed early in their own bedroom and still enjoy your own time in the living area. We’ve stayed at many Big 4 Caravan Parks over the past five years (if only they offered loyalty cards!) and they’re renowned for being child-friendly. I can’t recommend them enough.
4) Prepare car activities
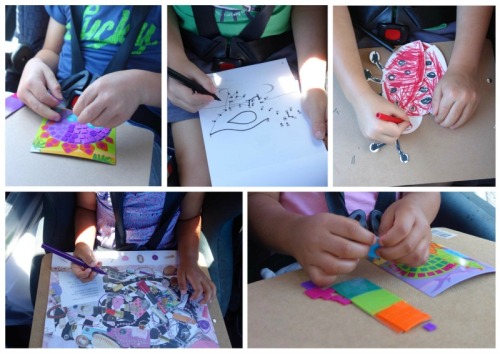 Prepare activities to be introduced at strategic points on the journey. These days there are so many little art/craft activities you can by at dollar stores which include all the items you need such as stickers/pencils/paper/glitter/glue etc. Buy some little portable clipboards that double as lap desks and make an event of it. Activities include colouring in, drawing, join the dots, mazes, crafts etc.
5) Create your own Spot It game
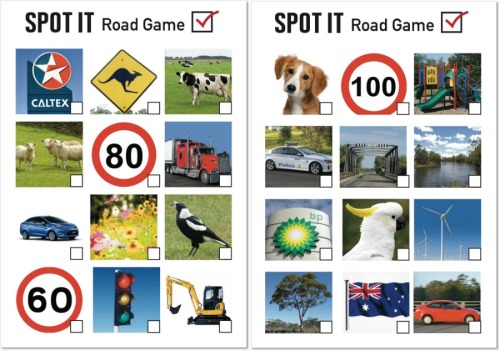 Before your trip give some thought to they types of things you are likely to see out the car window such as road signs, animals, wind farms, trucks, roadworks, traffic lights etc. Put these images into an activity sheet that the children can mark off when they see them. My children loved this Spot It activity more than any other activity on the trip. They completed their two sheets on the first half day of driving and next time I will create a series of Spot It activity sheets for each leg of the journey.
6) Keep a travel diary
 Give the children a small scrapbook each so that they can keep a travel diary. Things you include in a travel diary are photographs, thoughts about the trip, drawings of things seen throughout the day, spellings of town names, the craft activities done on the trip etc. At the end of each day, the children can ‘complete’ pages of the diary. Interview them and record their responses.
Here’s what my son saw from his car window on day one: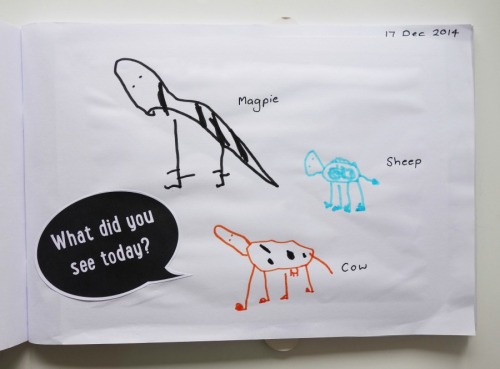 This is what my daughter saw from her car window:

7) Travel music and car audio books
 Play music that is fun to listen to, it doesn’t have to be children’s music, it can be Beatles, Abba etc. The sky’s the limit. Sing along and teach the children the lyrics or let the music be a backdrop to watching the world go by. I also discovered that Target stock a whole selection of 10-15 minute children’s audio books. Pop in a CD and the children can follow the storyline in the book and turn the pages when they hear a chime.
8) Create a map for the journey
 Involve your kids with a map of the journey. Maps give children a sense of where they’re going and they can circle or mark off towns that they pass through. Scan a map from your road atlas or download a good online map and put it in a child friendly format. Even if your children can’t read, maps are valuable in helping them appreciate geography and a sense of time and distance covered.
9) Bring an iPad stocked with kids’ programs
 This is not necessary but it’s a great tool when everyone needs an hour or two of down time on the road. Load up some good kids movies or programs beforehand. A favourite program in our house is Shaun the Sheep. It’s funny and suitable for all ages.
10) Plan each travel day

Let’s face it…spontaneity with small children is overrated. Plan where you will be stopping in advance, research the playgrounds in the towns where you will stop. Prepare some running / stretching games to do on the grass to get them moving in the breaks. The last thing you want the kids to do is sit down during a entire rest stop.
Inside the car we structure the travel day with a mix of activities like this:
- Looking out the window and watching the world
- Craft Activities
- Sleep
- Snacks
- Movie on the iPad
- Music / singalong
In closing…
 I want to say how much fun it was to do this big journey with my children. We live in a great big world with so much to see and do and traversing it by car created some amazing memories and experiences that we would not have had in airports or on an airplane. On the way back home we went off road a little a stayed in a cattle station in the middle of the Hay Plains and saw so many wonderful things such as emus running along next to our car and a sunset to die for. It’s often not practical to travel like this on a regular basis, but it makes something pretty extraordinary out of the ordinary if you do.
 This Easter Sunday we spent some time in the morning making Easter bunting to decorate the house for lunch.
 Step 2) Use scissors to cut out the eggs.
 Step 3) Decide the order you would like to have your eggs placed on the twine, using contrasting colours and patterns.
 Step 4) Punch two small holes in the top of each egg.
 Step 5) Thread each egg with twine.
 Step 6) Attach your Easter bunting to the wall with masking tape.
 Happy Easter x